

Linda Miller, Stampin' Up! Demonstrator, Owner of Linda's Cardstock Creations
Tuesday, October 3, 2017

Monday, October 2, 2017
October Stamp, Stick, and Send On-Line class
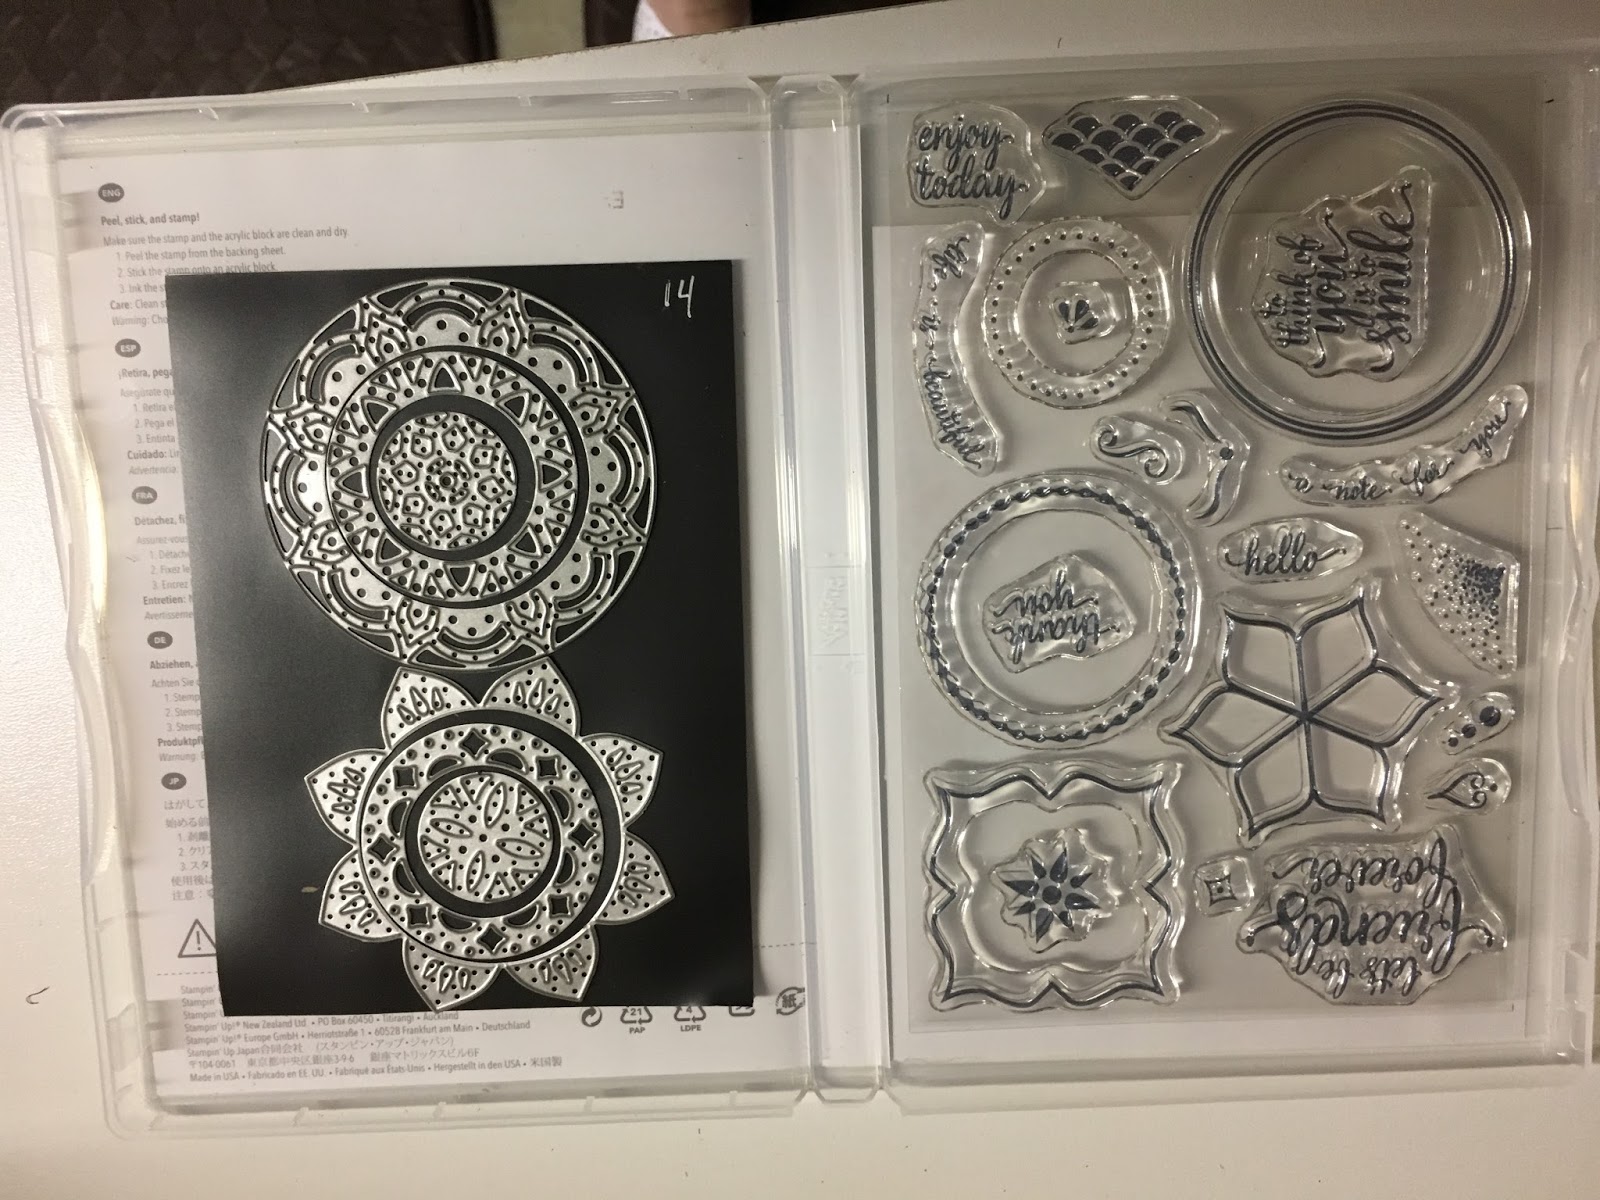
Hello everyone. This month I have chosen my favorite stamp from the Holiday catalog - Painted Harvest. I think this stamp set is absolutely gorgeous. I have been having so much fun using the sunflowers in different ways, and different colors. Years ago Stampin' Up! had a Sunflower stamp set. I am so glad we have a new one.
Here are the 5 cards I designed for this month's
Stamp, Stick, and Send Class
Each Card Class has 2 Special Fold cards
Kits contain everything you need to Stamp - Stick, and Send.
Envelopes included. All you need to supply is ink and adhesive of your choice. Please contact me if you have any questions.
I did not use the leaf punch on any of these cards, but the leaves can be used in many ways. If you think you would like to have the leaf punch, it is in a bundle so you can save 10 %
This class price is $28.49. This includes the stamp set that I will order for you plus the PDF with instructions, material list, and photos. Shipping is also included in this price.
The class with the bundle - $40.58. Includes the stamp set, leaf punch, the PDF with instructions, material list, and photos. Shipping is also included in this price.
Let me know which option you prefer. I will order the stamp set for you. It will come directly from Stampin' Up! I will mail your card kit when payment is received, and the PDF will be emailed to you. You can send me a check for the total amount or I can send you a PayPal invoice. You do not need a Pay Pal account to pay this way.


Monday, September 25, 2017
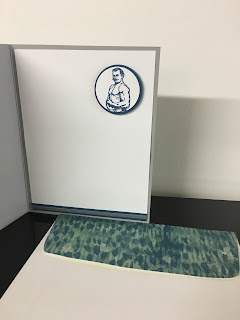
Masculine Monday
Hi everyone. Today's Masculine card is a birthday card I made for my son-in-law's birthday this week. The only stamping is the Happy Birthday using the Teeny Tiny Wishes stamp set. Joe is a mechanic so I thought he would enjoy this replica of one of his tool boxes.
If you would like a pdf of the instructions, just shoot me an email and I will send it to you.
Thanks for stopping by!
Supplies:
Non SU - black permanent marker


If you would like a pdf of the instructions, just shoot me an email and I will send it to you.
Thanks for stopping by!
Supplies:
Non SU - black permanent marker


Friday, September 1, 2017
Stamp, Stick, and Send September On-Line Card Class
Hello everyone. Here is my 1st product based On-Line Card Class.


Stamp set of the month for September - Colorful Seasons
Total with Stamp Set only:
$37.43
Total with Stamp Set and Seasonal Layers Bundle:
$ 62.96
PDF only - $3.95
Class Information:
Thanks for stopping by!


Fun Fold card
Stamp set of the month for September - Colorful Seasons
Total with Stamp Set only:
$37.43
Total with Stamp Set and Seasonal Layers Bundle:
$ 62.96
PDF only - $3.95
Class Information:
|
Thanks for stopping by!
Holiday Catalog
So exciting!!!
Today is the 1st day to order from the Holiday Catalog! You can see it On-Line or in your new catalog that I sent you. If you have ordered from me in the past, or place an order with me, I will be glad to send a catalog out to you.
If you would like to order from me, you can click on the top left hand corner of my blog and go directly to my Stampin ' Up! website.
Thanks for visiting today.!
Wednesday, August 30, 2017
Tip Tuesday
Hi everyone. Just a quick tip on making banners. Cut 2 pieces of cardstock the same length. You want your top layer to be 1/4" smaller in width.
Put the top layer on the base layer.
Mark a line down the center as deep as you want. Mark from the center to both ends as in photo. Slide top piece past the left end until you are happy with the layering difference. I like about a 1/4".
Cut off what is hanging off. Slide back to where you want at the points.
If you want the top piece to look like it has a border, cut a little more off of it, slide back towards the cut out V and attach.


Thanks for stopping by. I hope this tip was helpful for you.
Monday, August 28, 2017
Masculine Monday
Country Livin'
Hi everyone. Country Livin' is the stamp set I used for today's card. I made it a "missing you" card, but there are many wordings that can fit in the Duet Banner Punch. I just wanted something different for a change. We do miss our guys, and gals don't we? I used the stamp set Thoughtful Banners. There are 56 stamps in this set. A few are banners with a couple accents, but WOW lots to choose from.


I cut off 1 1/2 inches from the bottom of the and the designer paper is on the inside actually.
Here are the supplies I used. If you would like to order any of these products, just click on the item and it will take you directly to my Stampin' Up! website.
Thanks for visiting. Hope you enjoy the card.
Wednesday, August 23, 2017
WOW Wednesday
Hi everyone.

 Front of card wiper showing
 Back of card with wiper closed
Wiper cards are so fun! They are actually much easier to make then it looks. I am still trying to get nerve enough to make my own videos, lol, but if you go on You tube and search for "Wiper Cards" you will find many good instructional videos.
On this Wiper Card I used Petal Garden Designer Paper and the Balloon Celebration Stamp Set. The bow is from the Mini Treat bag thinlits. After cutting, scoring, and making your wiper, it doesn't take long to make as it is a simple design. After stamping, punch out your balloons or whatever you want to use on the wiper. After that, I just layered the card base with card stock and designer paper. Glitter enamel dots, and Wink of Stella was added to the flowers of course! It is beautiful with the sparkling flowers, but it doesn't show up very well in the photo.
Stampin' Up!'s Designer Paper is so beautiful I am enjoying using it on many of my cards as the focal point. Let me know what you think.
Here are the basic supplies I used. Click on any item and it will take you directly to my Stampin' Up! website should you chose to order from me. I would love to be your demonstrator if you do not have one. Please contact me if you have any questions.
Thanks for stopping by.

Front of card


Wiper cards are so fun! They are actually much easier to make then it looks. I am still trying to get nerve enough to make my own videos, lol, but if you go on You tube and search for "Wiper Cards" you will find many good instructional videos.
On this Wiper Card I used Petal Garden Designer Paper and the Balloon Celebration Stamp Set. The bow is from the Mini Treat bag thinlits. After cutting, scoring, and making your wiper, it doesn't take long to make as it is a simple design. After stamping, punch out your balloons or whatever you want to use on the wiper. After that, I just layered the card base with card stock and designer paper. Glitter enamel dots, and Wink of Stella was added to the flowers of course! It is beautiful with the sparkling flowers, but it doesn't show up very well in the photo.
Stampin' Up!'s Designer Paper is so beautiful I am enjoying using it on many of my cards as the focal point. Let me know what you think.
Here are the basic supplies I used. Click on any item and it will take you directly to my Stampin' Up! website should you chose to order from me. I would love to be your demonstrator if you do not have one. Please contact me if you have any questions.
Thanks for stopping by.
Tuesday, August 22, 2017
Tip Tuesday
Hi everyone. Try this tip to get more use out of your thinlits and framelits. I use white cardstock and stick it to the Sizzix adhesive sheets. Use the Bigshot and cut them out. Put them on a sheet of cardstock. I use retired paper. Put a label for which thinlits or framelits there are on the cardstock. This will show you all the different sizes of framelits for you to match up images and words to see what will fit. Cutting out all the thinlits and having a copy of all the dies in front of you, allows you to see all the possibilities of how you can use them.
This is the Mini Treat Bag. Sometimes we forget all the accessory dies that come with these products. Cut them out using the adhesive sheets (because they are small), then just peel and stick to add to your project. There are so many possibilities to use the cut outs on your cards, boxes, etc.
Hope you find this tip helpful.

 |
| When I put the dies on the magnets, I always put the name of the set as well as how many there are to make sure when I put them away I haven't lost any. I put them in plastic bags and keep them in a basket. As I stated in an earlier post, I keep the thinlits that go with a stamp set right inside the case with the stamps. |

Thanks for stopping by!
Monday, August 21, 2017
Masculine Monday
Hi everyone. Here is a clean and simple masculine card. I made it a birthday card, but of course it could be used with any other sentiment.


Card base is 5 1/2" x 8 1/2" Crumb cake Scored at 4 1/4:
The Old Olive cardstock on the left is 1 1/4" x 5 1/2"
The Pick a Petal designer paper is 1" x 5 1/2"
Layers of cardstock are Choc. Chip 2 3/4" square and Old Olive 2 3/8"
Center focal piece is Very Vanilla cut at 2" square
4" x 5 1/4" Very Vanilla insert piece
Very Vanilla envelope or Crumb Cake would look nice too
I used the 1/2" corner punch for the corners of the layer pieces
Thanks for stopping by!
If you would like to order any of these products from my website, here is what you need:
Saturday, August 19, 2017
SPOILER ALERT!!! My August Paper Pumpkin came today
What an adorable card set - with a box and window sheet lid! I love these colors and simple designs Eight cards in all. Stamp set is a wonderful array of "stamps that say I care". Watch the video here for ideas on making your cards.
https://www.youtube.com/watch?v=CygOvTE288Q

Thanks for stopping by!
https://www.youtube.com/watch?v=CygOvTE288Q

Thanks for stopping by!
Friday, August 18, 2017
Simple, Elegant Designer Paper Card
Hi Everyone.
Here is a beautiful, simple card using the Designer Paper Petal Garden.
Thank you Mercedes Weber for the original design. See her card here at mercedesweber.blogspot.com


Here is a beautiful, simple card using the Designer Paper Petal Garden.
- I used Thick White Cardstock 8 1/2 x 5 1/2 and scored it at 4 1/4.
- The next layer is Soft Sky cut at 4 x 5 1/4 and used the Marbeled background background stamp with the Soft Sky ink pad.
- I glued a doily in the center then with Archival ink stamped my saying onto a Whisper White piece of cardstock that was cut with #3 stitched circle framelit.
- Glue onto the doily. The 1/4" Daper Denim ribbon is attached with a glue dot.
- I cut the roses from a the 6x6 piece of the designer paper.
- Cut a piece of multipurpose adhesive sheet the same size as the flowers and leaves
- Place cut flowers on sticky part, peel off and place on a piece of Whisper White cardstock that is a little larger than the flowers.
- Fussy cut them out and place where desired around the doily using dimensionals.
- Add a 1/2" strip of Sky Blue cardstock and 1/4" of the othr side of the Designer Paper for the inside
- Of course, I had to put Wink of Stella on my roses!
Thank you Mercedes Weber for the original design. See her card here at mercedesweber.blogspot.com


Thursday, August 17, 2017
Paper Pumpkim 50% OFF

Paper Pumpkin makes a wonderful gift. My granddaughter loves getting her own box in the mail. She invites her friends over and enjoys sharing her creativity.
Thanks for stopping by!
Thanks for stopping by!
Tuesday, August 15, 2017
Tuesday Tip
Hello everyone. Today I would like to share a few tips that I find helps me in designing my cards more efficiently. Hopefully it might be of use to you also. I like to cut out all the sizes of my framelits when I get them. I put them in small zip lock plastic bags and keep them in one of the plastic cases that I use for my framelits and thinlits. Inside the case I have a magnetic sheet to keep my framelits and the bags with the cut outs. This helps me determine quickly which size framelit I need for each particular wording that I want to use.
The cases come in 3 sizes and are the same cases that the stamp sets we purchase are in. They were mistakenly left out of the new catalog this year, but are still for sale. I use them for keeping embellishments in, thinlits, framelits, and even my Big Shot Die brush set.
Here are a just a few photos of the uses of the boxes.


Thanks for stopping by
The cases come in 3 sizes and are the same cases that the stamp sets we purchase are in. They were mistakenly left out of the new catalog this year, but are still for sale. I use them for keeping embellishments in, thinlits, framelits, and even my Big Shot Die brush set.
Here are a just a few photos of the uses of the boxes.

These are the magnetic sheets I use found at Home Depot and Lowes
 How I mark my framelits
  3 X 5 bags used for this size framelits
My thinlits and stamps in the case that my stamps come in. I like to keep them together as it saves space and organized.
Here are the case information:
Thursday, July 20, 2017
Birthday Card
Happy Birthday Alyssa. Here is the birthday card I made for my granddaughter who turns 13 on the 28th of this month. I found the design on Pinterest from a card from Emma Trenouth.


Thanks for stopping by!
Tuesday, July 18, 2017
Tip Tuesday
Thinlits and Framelits storage

I like to keep my thinlits and framelits together with my stamp sets. I cut a magnetic sheet 4 1/2" x 6 1/2" or smaller depending on the number of thinlits that need to go on the sheet. I cut two smaller sheets and attach them together so I could put thinlits on both sides. The number on the magnet sheet is how many are in the set of thinlits. This way I can make sure they are all accounted for before putting them away.

The sheets I use are Ventilation sheets for the vents in your house. They can be found at Lowes or Home Depot for about $5. There are 3 sheets to each pack. I cut them to the size I need and save the left over and use the smaller pieces for other projects like book marks, etc. The size of each sheet is approximately 8" x 15".)
I hope you find Today's Tip helpful. Thanks for stopping by!
Monday, July 17, 2017
Masculine Monday
Love the stamp set Guy Greetings. Here is a card from one of my past monthly classes. A young man in our neighborhood helped us by picking up a refrigerator and putting it in my stamp studio. Thank you again Doris for your generosity in giving me the refrigerator! I gave him this card using the words Thank You of course, with a small gift inside. It seemed very appropriate. What do you think?
 This is a simple card with layers and hand cut greeting. I used a blender pen, Smoky Slate and Powder Pink ink pads to color the image.


Inside the card I stamped the top of the man on Whisper White CS. I punched it with the 1 1/4" circle punch, then punched out the CS behind the focal image with the 1 3/8" circle punch. It is attached with 2 dimensionals. On the bottom inside of the card are 2 strips of Dapper Denim (1/8" and Designer Paper 1/4") The flap of the envelope has a piece of 2 1/4" x 6" DP and cut off the excess.
Thanks for stopping by today.
Sunday, July 16, 2017
Click here to open the link for Christmas in July!
Join my team
Cardstock Cuties
Choose a kit of $125 in
product of your choice for $99
Plus get an
"Essentials Packet" $52 value:
Paper Snips
Bone Folder
(2) Size D acrylic
Blocks
Package of Grid Paper
Snail Adhesive
You get the
"new" Christmas Stamp Set "Carols of Christmas" Stamp
($20 value) that will be in this year’s Holiday Catalog.
This Christmas in July
promotion gives you $197.00 in product for only $99. Amazing!
There is no obligation
when joining. There is a minimum quarterly sales requirement, but if you do not
meet the requirement, you keep the kit with no obligation. And, you are
guaranteed to remain a demonstrator with at least a 20% discount until the end
of December.
Contact me if you are
interested and I will let you know about all the "many other"
benefits that come with being a demonstrator and a member of my
team.
I have been a
demonstrator going on 12 years. I would love to have you on my team.
Join us whether you want to become a demonstrator just for the discount or to
run a business for yourself. I love sharing my knowledge and creativity
while mentoring my team mates to help them reach their plans and goals whatever
they might be.
Back in the Blog World. Can't believe how long it's been.
Monthly Stamp Class in the Mail
 |
| 3-D project Wood Crate with Four 3x3 cards |
 |
| Special Fold Flap Card |
 |
| Off Center Technique Card |
 |
| Framed Focal Image Card |
I have had requests to offer my monthly Stamp Class in the mail for those who cannot attend in my studio. Thank you for your interest.
Kits will be available on the 15th of each month
Due to Stampin' Up! policy no stamping is allowed with mailed kits. You will receive everything you need to complete the cards and projects. Directions with a list of supplies and Photos will be emailed to you. If you don't have the specific stamp set used, you can substitute with what you have.
Option 1 - $10 plus $4 shipping): $14 each Kit
* Please keep in mind that minimum shipping is $6.95 for all orders under $69.95 and for all orders over $69.95 the shipping is 10%.
If you live local and place a $20 or more order, you can pick up your kit to save on the shipping.
When I receive notice that you have placed an order, your packet will be mailed to you within 48 hours. If you would like me to place the order for you, just contact me and I will be glad to do that for you. Email me if you would like to purchase the kit (no order) and I will send you a Paypal invoice or you can send me a check for the $14.
For more detailed information on this class - sign up for my newsletter.
For more detailed information on this class - sign up for my newsletter.
Subscribe to:
Comments (Atom)